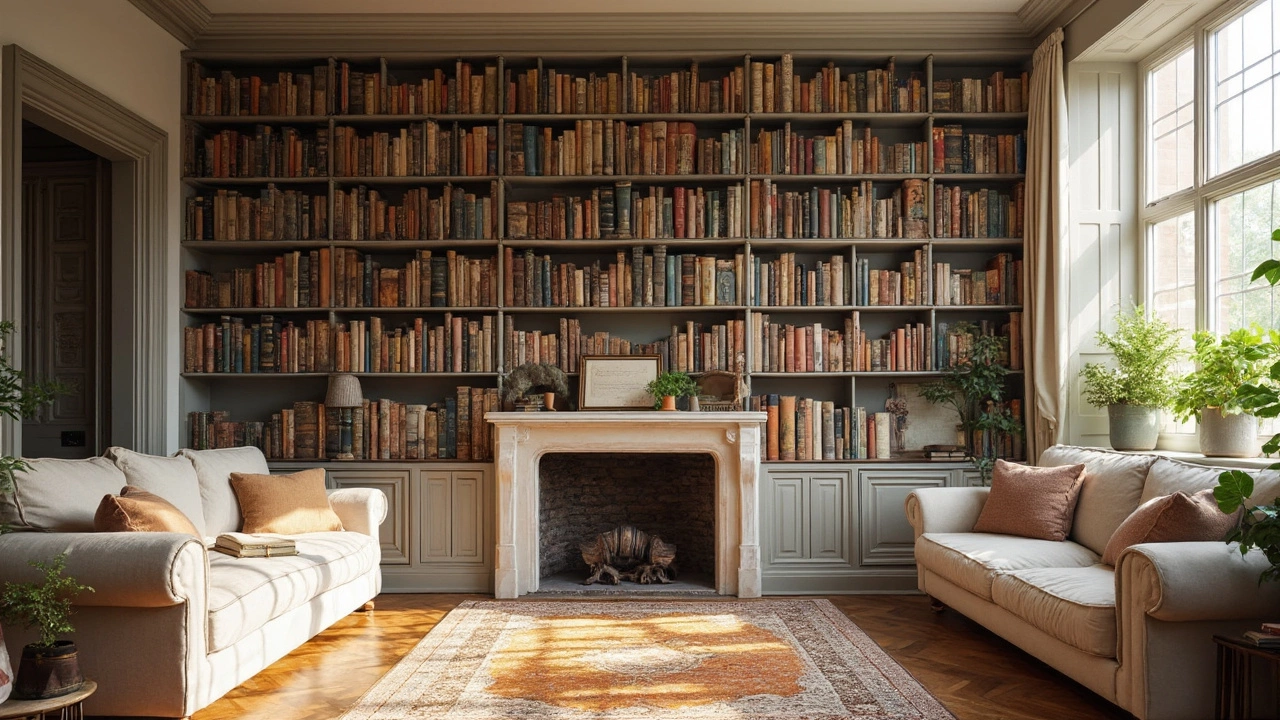
Built‑in Shelving: Smart Ways to Add Storage & Style
Running out of floor space? Built‑in shelving lets you turn unused walls into useful storage without crowding the room. It works especially well in cottages or cabins where every square foot counts, and the rustic look adds warmth. You don’t need a designer to get great results – just a plan, a few tools and the right materials.
Planning Your Built‑in Shelves
First, decide what you want to store. Books, dishes, decorative boxes, or a mix? Measuring the items helps you set shelf heights that actually fit. A common rule is to leave 12‑14 inches between shelves for most books, and a deeper 16‑20 inches for larger items.
Next, choose the wall. Load‑bearing walls can hold heavier timber, while interior partitions are perfect for lighter plywood or MDF. Look for studs or use a stud finder; anchoring shelves to studs gives the strongest support.
Sketch a simple diagram. Mark the overall width, shelf spacing and any cut‑outs for windows or doors. Even a hand‑drawn plan saves you from costly mistakes later.
Design Details That Make a Difference
Material matters. Solid oak or reclaimed pine give a true rustic feel and stand up to weight. If budget is tight, quality plywood with a veneer finish works just as well and is easier to cut.
Finish the wood with a clear oil or matte varnish. This protects the surface while letting the natural grain show. Avoid high‑gloss paints if you want that authentic, lived‑in vibe.
Trim the edges with simple bead‑board or a thin plinth. It hides any gaps and adds a finished look without extra cost. For a custom touch, add decorative brackets – even simple metal ones can become a design feature.
When placing the shelves, think about eye level. The most‑used zone should be around 4‑5 feet high, so you don’t have to stretch constantly. Keep lower shelves clear for display items; higher ones work for storage you don’t need daily.
Lighting can turn a plain wall into a showcase. LED strip lights behind each shelf or a small puck light on the underside adds both function and ambience.
Installation is straightforward. Cut the boards to size, attach a backboard to the wall, then secure each shelf using brackets or a pocket‑hole system. Double‑check level after every step – a wobbly shelf looks cheap fast.
Finally, style it. Mix a few woven baskets, a couple of framed photos and a plant pot to break up the wood. The goal is a balanced look that feels lived‑in, not staged.
Built‑in shelving gives you storage, style and a touch of personal history in one package. Whether you’re fitting a small cabin nook or a larger living room, the same basics apply – plan, pick the right wood, finish simply, and install securely. Follow these steps and you’ll have a functional, rustic feature that lasts for years.
Floor to Ceiling Bookshelves Cost: What to Expect Before You Build
Ever dreamt of turning your wall into a giant bookshelf? Discover the real costs behind floor-to-ceiling bookshelves, plus what actually drives prices up (or down). You'll learn about DIY options versus pro installs, how materials change your budget, and key tips to stretch every dollar. This guide makes the bookshelf planning process a whole lot less intimidating. Make more space for your books—and your wallet.
More