DIY TV Stand: Simple Steps to Build a Sturdy Entertainment Center
If you’ve been scrolling through endless catalogue pages, you know how pricey a ready‑made TV stand can get. The good news? You can create a custom piece yourself in a weekend, and it will match your room perfectly. All you need is a bit of patience, basic tools, and these clear instructions.
Planning Your DIY TV Stand
Start by measuring the TV’s width, height, and depth. Add a couple of inches on each side so the screen sits comfortably without touching the edges. Next, decide how much storage you want – shelves for consoles, a drawer for remotes, or an open shelf for décor. Sketch a simple diagram on paper; keep the lines straight and note the dimensions of each part.
Choosing the right wood makes a big difference. Pine is cheap and easy to work with, while oak and walnut give a richer look but cost more. For a budget‑friendly build, go with pine and finish with a dark stain for a sophisticated vibe. Make sure the wood thickness is at least ¾ inch for durability, especially on the shelf that holds the TV.
Step‑by‑Step Build Guide
1. Gather tools and materials. You’ll need a circular saw or table saw, drill, set of drill bits, a carpenter’s square, sandpaper (120‑grit and 220‑grit), wood glue, clamps, and a screwdriver. Buy wood boards cut to size from your local lumberyard, or ask them to cut to your measurements – it saves a lot of time.
2. Cut the panels. Cut two side panels, a top panel, a bottom panel, and the back panel. If you want a lower shelf, cut an extra horizontal board. Double‑check each cut with the carpenter’s square before moving on.
3. Assemble the frame. Apply wood glue to the edges where the sides meet the top and bottom. Use clamps to hold the joints while you drill pilot holes and screw the pieces together. Two 2‑inch wood screws per joint give solid support without splitting the wood.
4. Add the back panel. Attach the back board with screws or nails; this adds stability and prevents the stand from wobbling. If you prefer a cleaner look, use a thin sheet of plywood and hide the screws with wood filler.
5. Install shelves. Measure the distance from the floor to where you want the lower shelf (usually around 12‑18 inches). Mark the sides, drill pocket holes, and screw the shelf board in place. If you added a middle shelf for consoles, repeat the same steps.
6. Sand and finish. Run 120‑grit sandpaper over all surfaces, then finish with 220‑grit for a smooth feel. Wipe away dust, then apply a wood conditioner if you’re using a stain. A dark walnut stain works great on pine, followed by a clear polyurethane coat for protection.
7. Install cable management. Drill a small hole at the back of the top panel for power cords. A simple cable raceway keeps wires tidy and prevents a tangled mess.
Once the finish dries, place your TV on the top shelf, arrange the consoles on lower shelves, and enjoy a clean look that you built yourself.
Building your own TV stand isn’t just about saving money; it’s about creating something that reflects your style and fits the exact dimensions of your room. Plus, you’ll have the satisfaction of saying, “I made that.” If you run into any hiccups, pause, re‑measure, and remember that a small adjustment now saves headaches later. Happy building!
TV Stand Alternatives: Creative Bedroom Solutions That Really Work
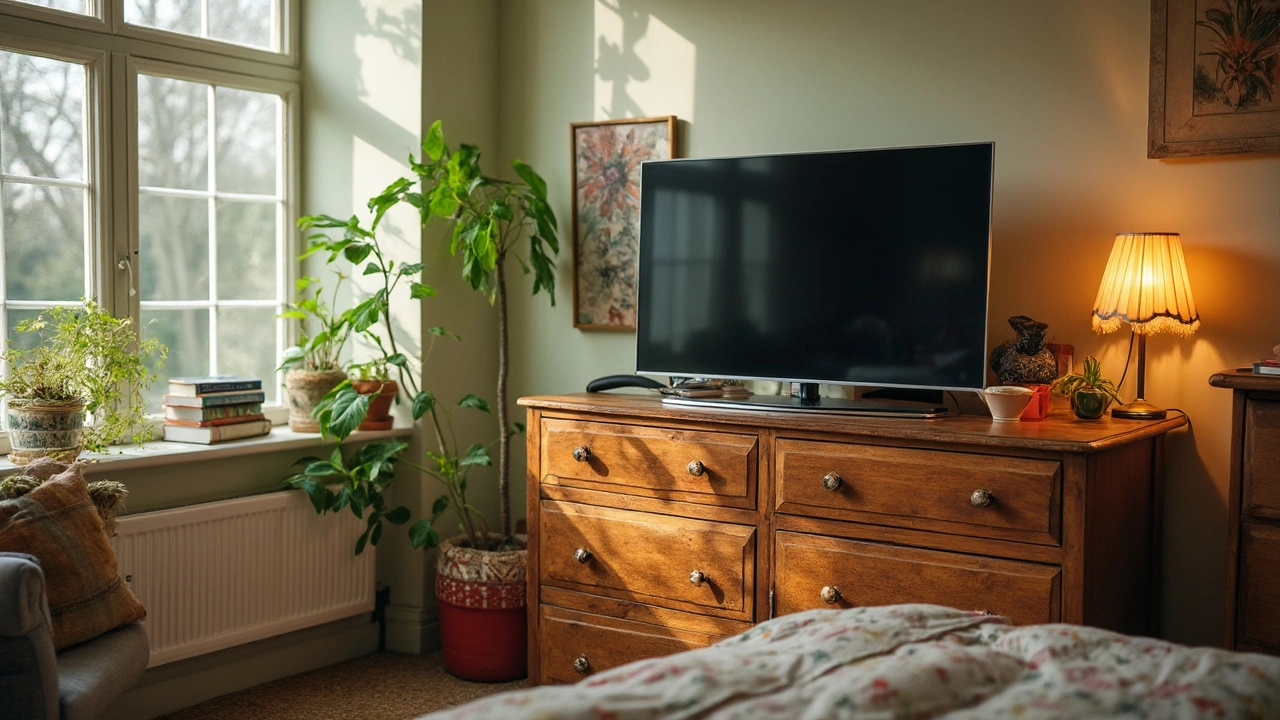
Stuck without a traditional TV stand in your bedroom? There's no need to stress. Tons of everyday items can double as stylish and functional TV stands, from dressers to wall shelves. This article breaks down easy, smart options—plus a few hacks—to help you pick what fits your space and style. Say goodbye to boring setups and hello to practical creativity. Get ready to rethink that little corner under your screen.
More