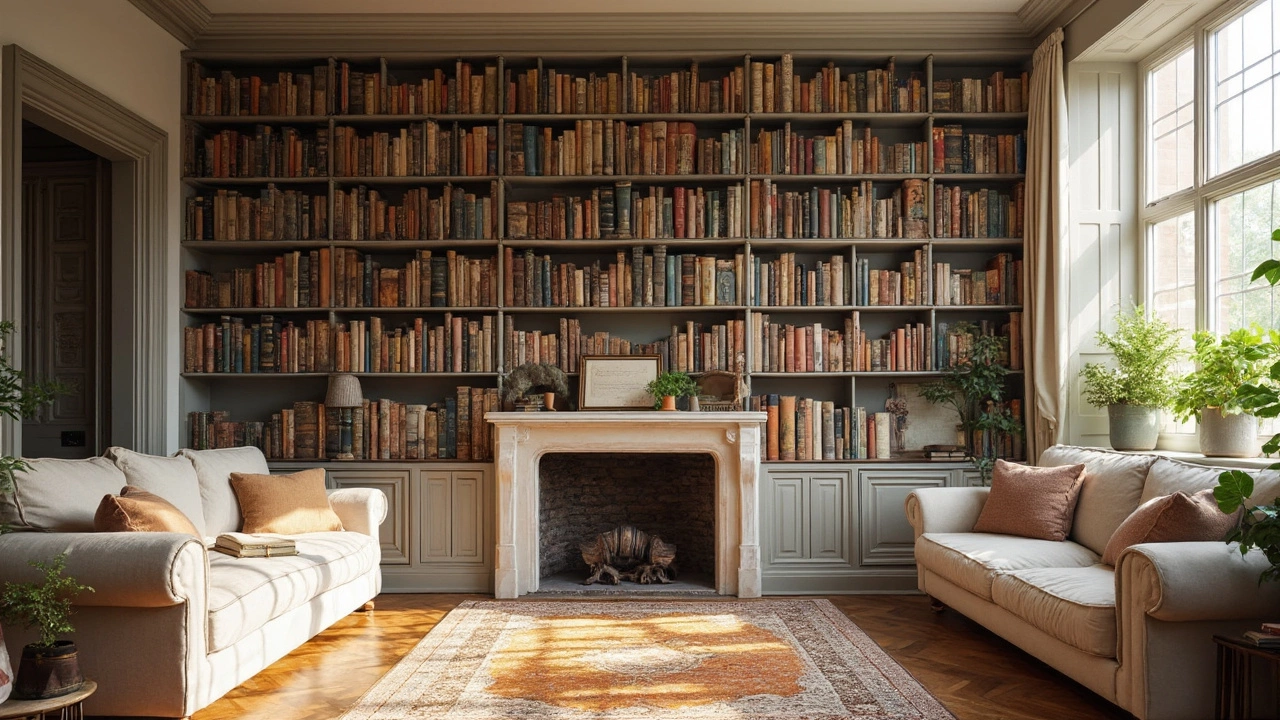
Floor to Ceiling Bookshelves – Turn Every Wall Into Storage
If you love a tidy room but feel the walls are wasting space, a floor‑to‑ceiling bookshelf is the answer. It gives you massive storage without taking up floor area, and it can become a striking feature in any room. Whether you’re styling a cottage, a city loft, or a modern office, the right design makes the whole space feel bigger and more organized.
First things first – measure the wall. Write down the exact height from floor to ceiling, then decide how many shelves you need. A good rule is to keep each shelf between 10 and 12 inches apart if you plan to store books of different sizes. Leave a few wider gaps for decorative items, plants, or boxes. Sketch a quick layout on paper; it helps you see how tall and wide each compartment will be before you drill any holes.
Planning and Installing Your Shelf
Choose a sturdy material that matches your style. Solid oak or reclaimed pine gives a rustic feel, while painted MDF works for a sleek look. If you’re environmentally minded, go for sustainably sourced timber – it’s a win for the planet and looks great in a rustic setting. Make sure the brackets or studs you use can bear the weight; a full‑height unit can hold 200 lb or more when loaded with books.
Installation is easier if you work in sections. Start at the bottom, attach a sturdy base board, then add each shelf one at a time, checking for levelness with a spirit level. Use wall anchors if your wall is drywall; they’ll keep the unit from wobbling. A secret tip: add a thin steel rod inside each shelf for extra support – you’ll barely notice it, but it prevents sagging over time.
Styling Tips for a Cohesive Look
Once the shelves are up, think about balance. Fill about two‑thirds of each row with books, then use the remaining space for décor. A row of copper candles, a few woven baskets, or a vintage clock adds visual interest without cluttering. Keep colour tones consistent – if you have a lot of dark wood, brighten the area with light‑coloured books or white vases.Lighting makes a big difference. Install LED strips behind each shelf or place small spotlights on the top rail. The glow highlights your favourite pieces and makes the whole wall feel inviting. For a rustic vibe, choose warm‑tone bulbs that mimic candlelight.
Don’t forget the floor. A runner rug or a low‑profile bench in front of the bookshelf gives you a place to sit and read, turning the wall into a mini‑library corner. If you have kids, add a low bin at the bottom for toys – it keeps the area tidy and the bookshelf still looks neat.
Finally, think about future changes. Keep a few empty shelves for new books or souvenirs you’ll collect over the years. A floor‑to‑ceiling bookshelf is a long‑term investment; designing it with flexibility means it stays useful and stylish for the whole family.
With the right planning, sturdy materials, and a dash of personal style, your floor‑to‑ceiling bookshelf can become the star of any room. It adds storage, showcases your personality, and makes the space feel intentionally designed – all without taking up extra floor space.
Floor to Ceiling Bookshelves Cost: What to Expect Before You Build
Ever dreamt of turning your wall into a giant bookshelf? Discover the real costs behind floor-to-ceiling bookshelves, plus what actually drives prices up (or down). You'll learn about DIY options versus pro installs, how materials change your budget, and key tips to stretch every dollar. This guide makes the bookshelf planning process a whole lot less intimidating. Make more space for your books—and your wallet.
More