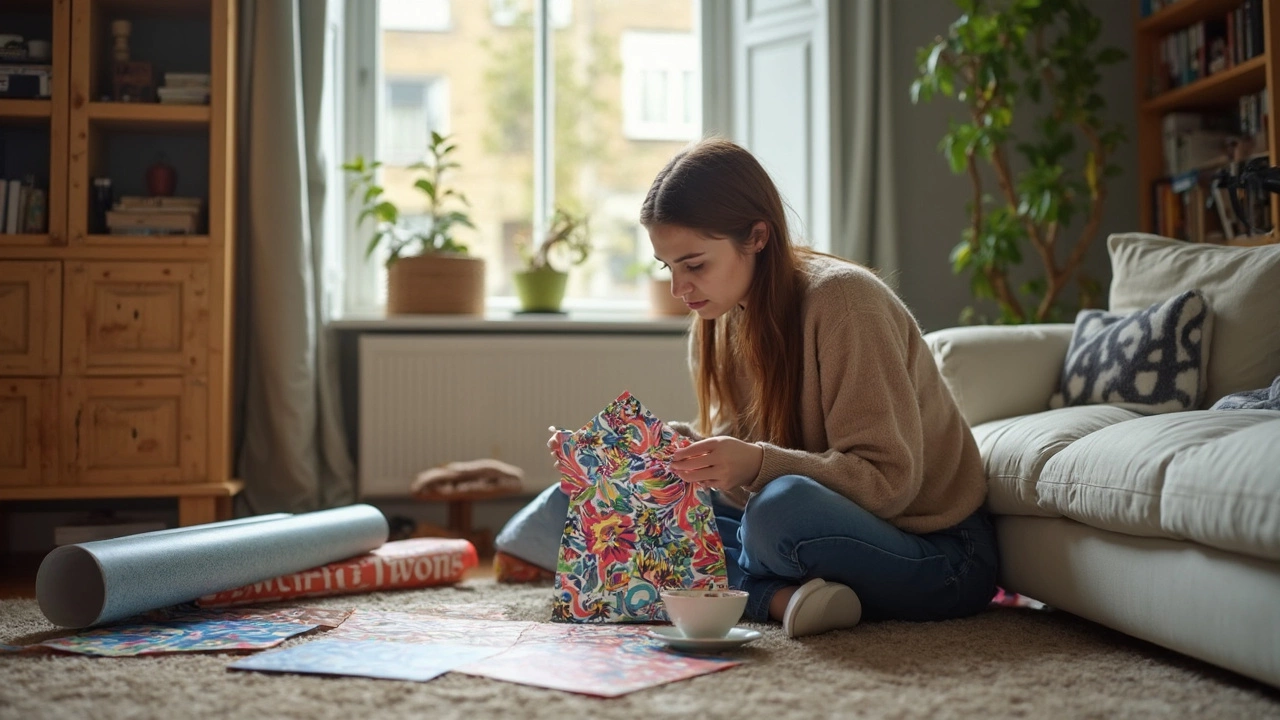
Did you know a roll of vinyl wrap can turn a bland old cabinet into the coolest thing in your house—without breaking the bank? Sounds simple, but how tough is it to pull off a smooth, pro-looking finish?
Vinyl wrap isn’t just for cars or kitchen counters anymore. Loads of folks are using it on storage cubes, dressers, even those wobbly shelves you got from that Swedish store. But before you grab a roll and a squeegee, let’s get clear: it’s not magic. There’s some elbow grease, a learning curve, and a few surprises—mostly sticky ones—waiting for you.
If you’ve never wrapped anything bigger than a notebook, don’t sweat it. Beginners can score decent results, with a bit of planning and patience. The hardest part? Flat surfaces are easy, but corners, grooves, and handles can trip anybody up, especially when the vinyl tugs or creases. But nobody gets it perfect the first time, and the best hacks come from people who’ve learned—the hard way—about peeling, re-sticking, and avoiding those annoying bubbles.
- Vinyl Wrap 101: What You Need to Know
- Best Types of Furniture to Vinyl Wrap
- What Makes Vinyl Wrapping Tricky?
- Step-by-Step: Wrapping Storage Furniture
- Pro Tips for a Smooth, Bubble-Free Finish
- When to Call It Quits (and Call a Pro)
Vinyl Wrap 101: What You Need to Know
If you’re new to vinyl wrap, here’s the deal—this stuff is basically a giant sticker with style. Vinyl sheets come in tons of finishes: matte, gloss, woodgrain, even wild marble patterns. The main point is, it sticks to clean, flat surfaces, giving the whole thing an instant makeover.
What makes vinyl cool for storage furniture? It’s budget-friendly, removable, and doesn’t ruin the surface underneath (goodbye, permanent regret). That’s why folks with rentals or growing kids love the stuff—it keeps furniture looking fresh without big-time commitment.
But here’s the catch: Furniture vinyl isn’t like regular contact paper. The better-quality wraps are a bit thicker, stretchier, and made to dodge bubbling. You’ll find vinyl in sheets or rolls, typically 12-24 inches wide, but always double-check the size before buying. Peel-and-stick is standard, though some brands call for extra adhesive.
Let’s clear up a common question: Can you rip it off easily later? Yep. Most mid-range and pro vinyl wraps are made for clean removal (think: no sticky gunk left behind), as long as you don’t let them cook in the sun for years.
Here’s a quick comparison of vinyl “grades” and their typical use:
| Type | Best For | Durability | Ease of Removal |
|---|---|---|---|
| Standard (Budget) | Temporary covers, small items | 6-12 months | Easy, may leave residue |
| Intermediate | Storage shelves, kids’ furniture | 1-3 years | Very easy, clean removal |
| Premium | High-traffic cabinets, long-term use | 5+ years | Easy, no residue |
According to an expert from 3M (a big name in the vinyl world):
"The secret to a long-lasting vinyl wrap is surface prep. If it’s clean and smooth, the vinyl will stick and stay—no matter how much the kids mess with it."
So, before you even touch the roll, get your furniture surface clean and dry. A spritz of rubbing alcohol and a wipe with a lint-free cloth does wonders. Skip painting right before wrapping—vinyl hates fresh paint. Last thing, always measure your furniture and the wrap twice. Running out of vinyl mid-project is a classic DIY heartbreak.
- Go for premium vinyl if your furniture gets touched a lot or sits in sunlight.
- Keep a plastic squeegee and a hairdryer handy—they help stretch and smooth the vinyl around little details.
- Don’t forget a sharp utility knife for trimming the wrap like a pro.
Best Types of Furniture to Vinyl Wrap
Not every piece of furniture plays nice with vinyl wrap. If you start with the right kind, the job goes smoother and sticks longer. The best pieces are flat, square, and not too detailed. Think of basic storage cubes, plain-front dressers, or simple shelving units. These don’t have a ton of grooves, carvings, or fancy hardware that will make life harder than it needs to be.
So what should you actually wrap? Here’s a no-nonsense breakdown:
- Storage furniture with smooth surfaces (like IKEA KALLAX or Billy shelves)
- Coffee tables with clean, panel-like tops
- Flat cabinet doors and drawer fronts
- Basic desks without too many cutouts or molded details
Furniture with high-gloss, laminate, or lightly textured surfaces usually accepts vinyl best. Avoid wrinkly old dressers with peeling veneer, deep wood grain, or curvy moldings, since the wrap struggles to stick and creases in tight spots.
Here’s a quick table, based on user reviews and product tests, showing what types of furniture are the easiest (and trickiest) to wrap:
| Furniture Type | Typical Difficulty | Notes |
|---|---|---|
| Flat-Front Cabinets | Easy | Large even surfaces, less trimming |
| Storage Cubes | Very Easy | Simple panels, minimal corners |
| Shelving Units | Easy to Medium | Watch for shelf edges and supports |
| Drawer Units (Flat Front) | Medium | Handles and narrow sides add some work |
| Molded or Ornate Furniture | Hard | Grooves and curves make wrapping tough |
If you want the fastest, least stressful experience, go for the plain stuff. You can always jazz it up with stickers or trim later. I learned the hard way with my daughter’s toy chest—those little decorative bumps on the lid were a vinyl nightmare. Flat panels? Much easier and way less complaining from both of us.
What Makes Vinyl Wrapping Tricky?
Vinyl wrapping storage furniture isn’t as simple as peeling and sticking. It throws a few curveballs, especially if you’ve only seen perfect before-and-after photos online. Sometimes things get wrinkly—fast.
The edges and corners are probably the biggest headache. Flat areas? No sweat. But once you hit corners, drawers, or those tiny grooves on cabinet doors, things get way more fiddly. The vinyl likes to crease or bubble there, and once it sticks, fixing mistakes can be… frustrating. People often get impatient, tug too hard, or stretch the vinyl so much it tears or won’t line up anymore.
There’s also the issue of different finishes. If you’re wrapping something glossy, the vinyl might not grip well and can peel up later. On bumpy or textured wood, the finish underneath can show through, so you lose that clean look. Cleanliness matters, too; a bit of dust under the vinyl can make lumps that show through, and grease or grime weakens the adhesive. So yes, you really do have to clean every surface first.
Temperature also messes with results. A too-cold room makes the vinyl stiff and uncooperative; if it’s too warm, the adhesive can get messy and hard to manage. Most manufacturers suggest working in a room that’s between 60°F (16°C) and 75°F (24°C).
- Precision cutting is key. Overhanging vinyl can catch and peel later, but trimming too short leaves bare spots.
- Patience is non-negotiable. Rushing is the fastest way to get bubbles.
- Tools matter. Even a credit card beats your fingers for smoothing, but a real squeegee is better. Use a sharp utility knife and never kid yourself with dull blades.
Here’s a quick look at the three most common problems people run into while wrapping furniture:
| Problem | Why It Happens | Quick Fix |
|---|---|---|
| Bubbles | Poor smoothing or dirt trapped underneath | Poke with a pin, smooth out, or peel slowly to reapply |
| Peeling edges | Poor surface preparation or over-stretching | Use a heat gun to press down, always clean thoroughly |
| Wrinkles | Too much force on corners or not enough heat | Warm the vinyl, gently stretch and press to smooth |
So, is it impossible? Not at all. Plenty of DIY-ers get great results, but there’s a reason pro shops charge real money for a vinyl wrap job. It’s all about practice, patience, and not skipping steps that feel boring.
Step-by-Step: Wrapping Storage Furniture
You don’t need a fancy workshop or expensive tools to vinyl wrap storage furniture. You just need the right stuff, some space, and a game plan. Here’s a no-nonsense guide so you can tackle it head-on.
- Clean the surface: Wipe down every bit of the furniture using a lint-free cloth and a basic cleaner (one without oil). Even tiny crumbs or dust can mess up the vinyl’s stickiness. Let everything dry totally.
- Measure and cut the vinyl: Don’t just eyeball it; grab a tape measure and write down your numbers. Add an inch or two around the edges—you’ll trim later. Mark the vinyl with a pencil, then cut it using a sharp craft knife or scissors. (Tip: A straight edge helps keep lines clean.)
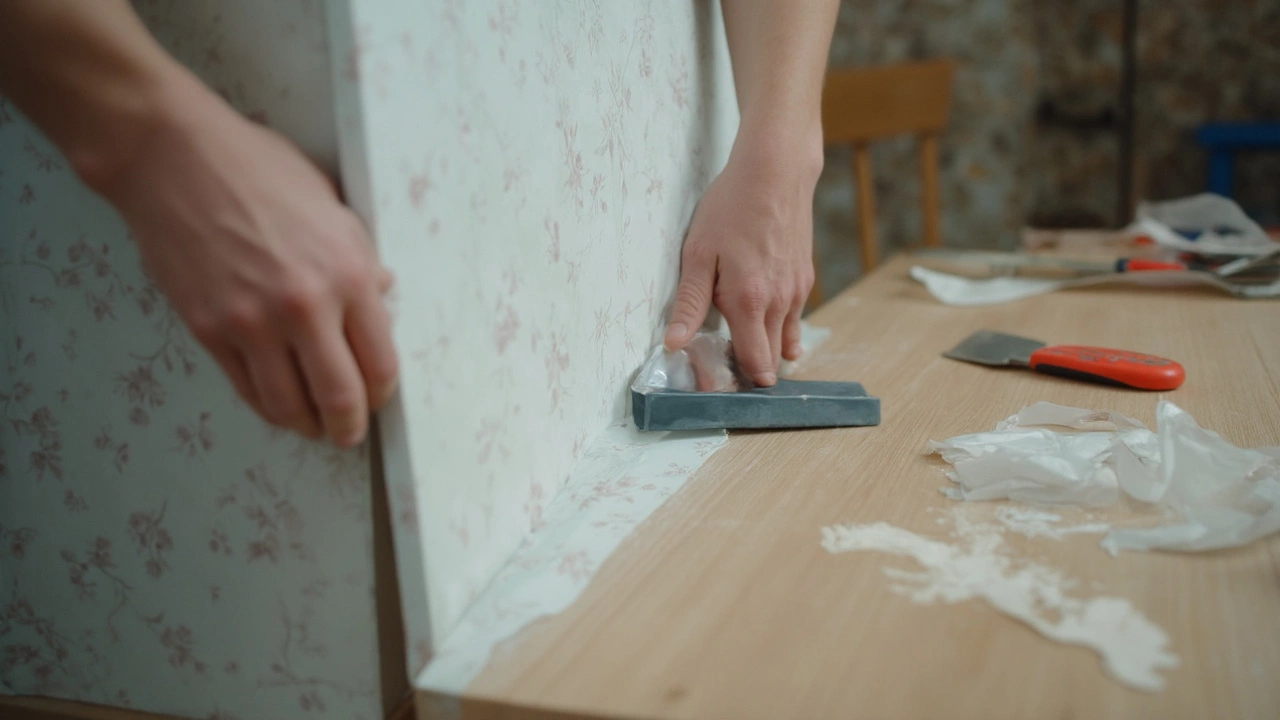
- Peel and stick—slowly: Start by peeling just a bit of the backing paper and line up the vinyl with one edge, sticky side down. Work slowly, smoothing it out with a squeegee or credit card as you go. Pull away the backing bit by bit, instead of all at once, to avoid tangling or misplacing.
- Work out bubbles and creases: Press from the center out, flattening bubbles as you go. Stubborn bubbles? Pop them with a pin, then smooth again. If you hit a sharp corner, use a hair dryer on low—warm vinyl wraps better. But don’t cook it, or it’ll melt.
- Trim the edges: Once the vinyl is set, use a sharp blade to trim the extra bits away. Take your time—crooked cuts show. Tuck edges around the back or inside for a cleaner look.
- Reassemble and admire: If you removed handles, drawers, or doors, put them back. Check all edges and fix any loose bits before calling it done.
Not all furniture is created equal for wrapping. Flat panels—think plain cabinet doors or the tops of storage cubes—are easiest. Curves, chunky handles, or rough finishes take more patience and time.
| Furniture Type | Average Time |
|---|---|
| Straight Bookshelf (no doors) | 30–45 min |
| 2-Drawer Storage Unit | 45–75 min |
| Multi-compartment Cube Shelf | 60–90 min |
| Cabinet with Handles & Grooves | 90–120 min |
When it comes to the vinyl wrap, most DIYers agree: start small before tackling the trickier stuff. Go slow, double-check your work, and don’t worry about the odd bubble—nobody’s looking at the underside anyway.
Pro Tips for a Smooth, Bubble-Free Finish
Let’s get real—wrapping storage furniture with vinyl wrap can go south fast if you rush it or miss a few key steps. You want it to look good close up, not just on Instagram. Here’s how to stack the odds in your favor.
- Clean like a pro: Even a bit of dust or grease can mess with the vinyl’s grip. Wipe everything down with rubbing alcohol. Skip regular cleaners—they can leave a film that kills the adhesive.
- Don’t peel it all at once: Pull back a few inches of the backing, line up your edge, and start pressing. Keep the rest of the backing on while you work your way out, pulling it slowly as you stick down more of the vinyl.
- Squeegee is your best friend: Use a plastic squeegee or an old credit card, wrapped in a sock or T-shirt. Always work from the middle out to push any air bubbles to the edge before they get trapped.
- Warm it up: A hairdryer on low makes vinyl more flexible, helping it stretch around curves and corners without wrinkling. Just don’t let it get too hot, or the vinyl can melt or warp.
- Attack bubbles ASAP: If you spot a bubble after finishing, poke a tiny hole in it with a pin, then press the air out with your squeegee. The vinyl should lay flat again if you move quickly.
- Trim with care: Use a sharp utility knife for neat edges. Go slow, especially near seams or corners where it’s easy to slip and cut too much.
One last tip: measure twice, cut once. Elara helped me wrap a bookshelf last year, and we learned the hard way when we misjudged a side panel and ran out of vinyl halfway through. Extra inches are cheap insurance against mistakes.
When to Call It Quits (and Call a Pro)
Alright, so you’ve given vinyl wrapping a shot but things are getting rough. Maybe the surface looks like a crumpled sticker sheet, corners keep lifting, or you just can’t shake the air bubbles. This is when it’s worth thinking about dialing up a pro.
If the vinyl wrap project is on something expensive—like a custom wardrobe or built-in storage that you really don’t want to ruin—don’t risk it. Professionals have heat guns calibrated just right, tools for odd angles, and the kind of experience you just can’t fake on your second try. They can make seams disappear, line up patterns perfectly, and know how to prep surfaces that aren’t exactly fresh out of the box.
Here are some clear signs you might want to step back:
- You’re wrapping huge pieces, like towering cabinets or floor-to-ceiling shelves. These take muscle and skill, and working solo often turns into a wrestling match.
- Your furniture has a ton of grooves, panels, or raised trim. The more “fancy stuff” it has, the tougher it gets to wrap without cuts, crinkles, or exposed spots.
- The vinyl keeps peeling up even after you’ve pressed it down. This can happen if there’s dust, or the furniture just doesn’t stick well because of the finish or age.
- You’ve already burned through a bunch of vinyl and it still looks off. Sometimes, DIY just costs more in wasted material and frustration.
There are online directories for vinyl wrap specialists, so you’re not stuck with random handymen. Ask for photos of their past jobs, and don’t be shy—tell them exactly what storage furniture you want done. Most pros will give you a ballpark quote after seeing a pic. It’s not free, but you save your nerves and a lot of ugly corners.
Some things are worth learning, but other times—especially if perfection matters or time’s tight—it’s okay to hand it over to someone with pro-level skills. Your wrap will last longer and look way better, and you’ll have more time for everything else (like promising your kid Elara you’d finally build that Lego castle together).
Write a comment